 Image 1 of 2
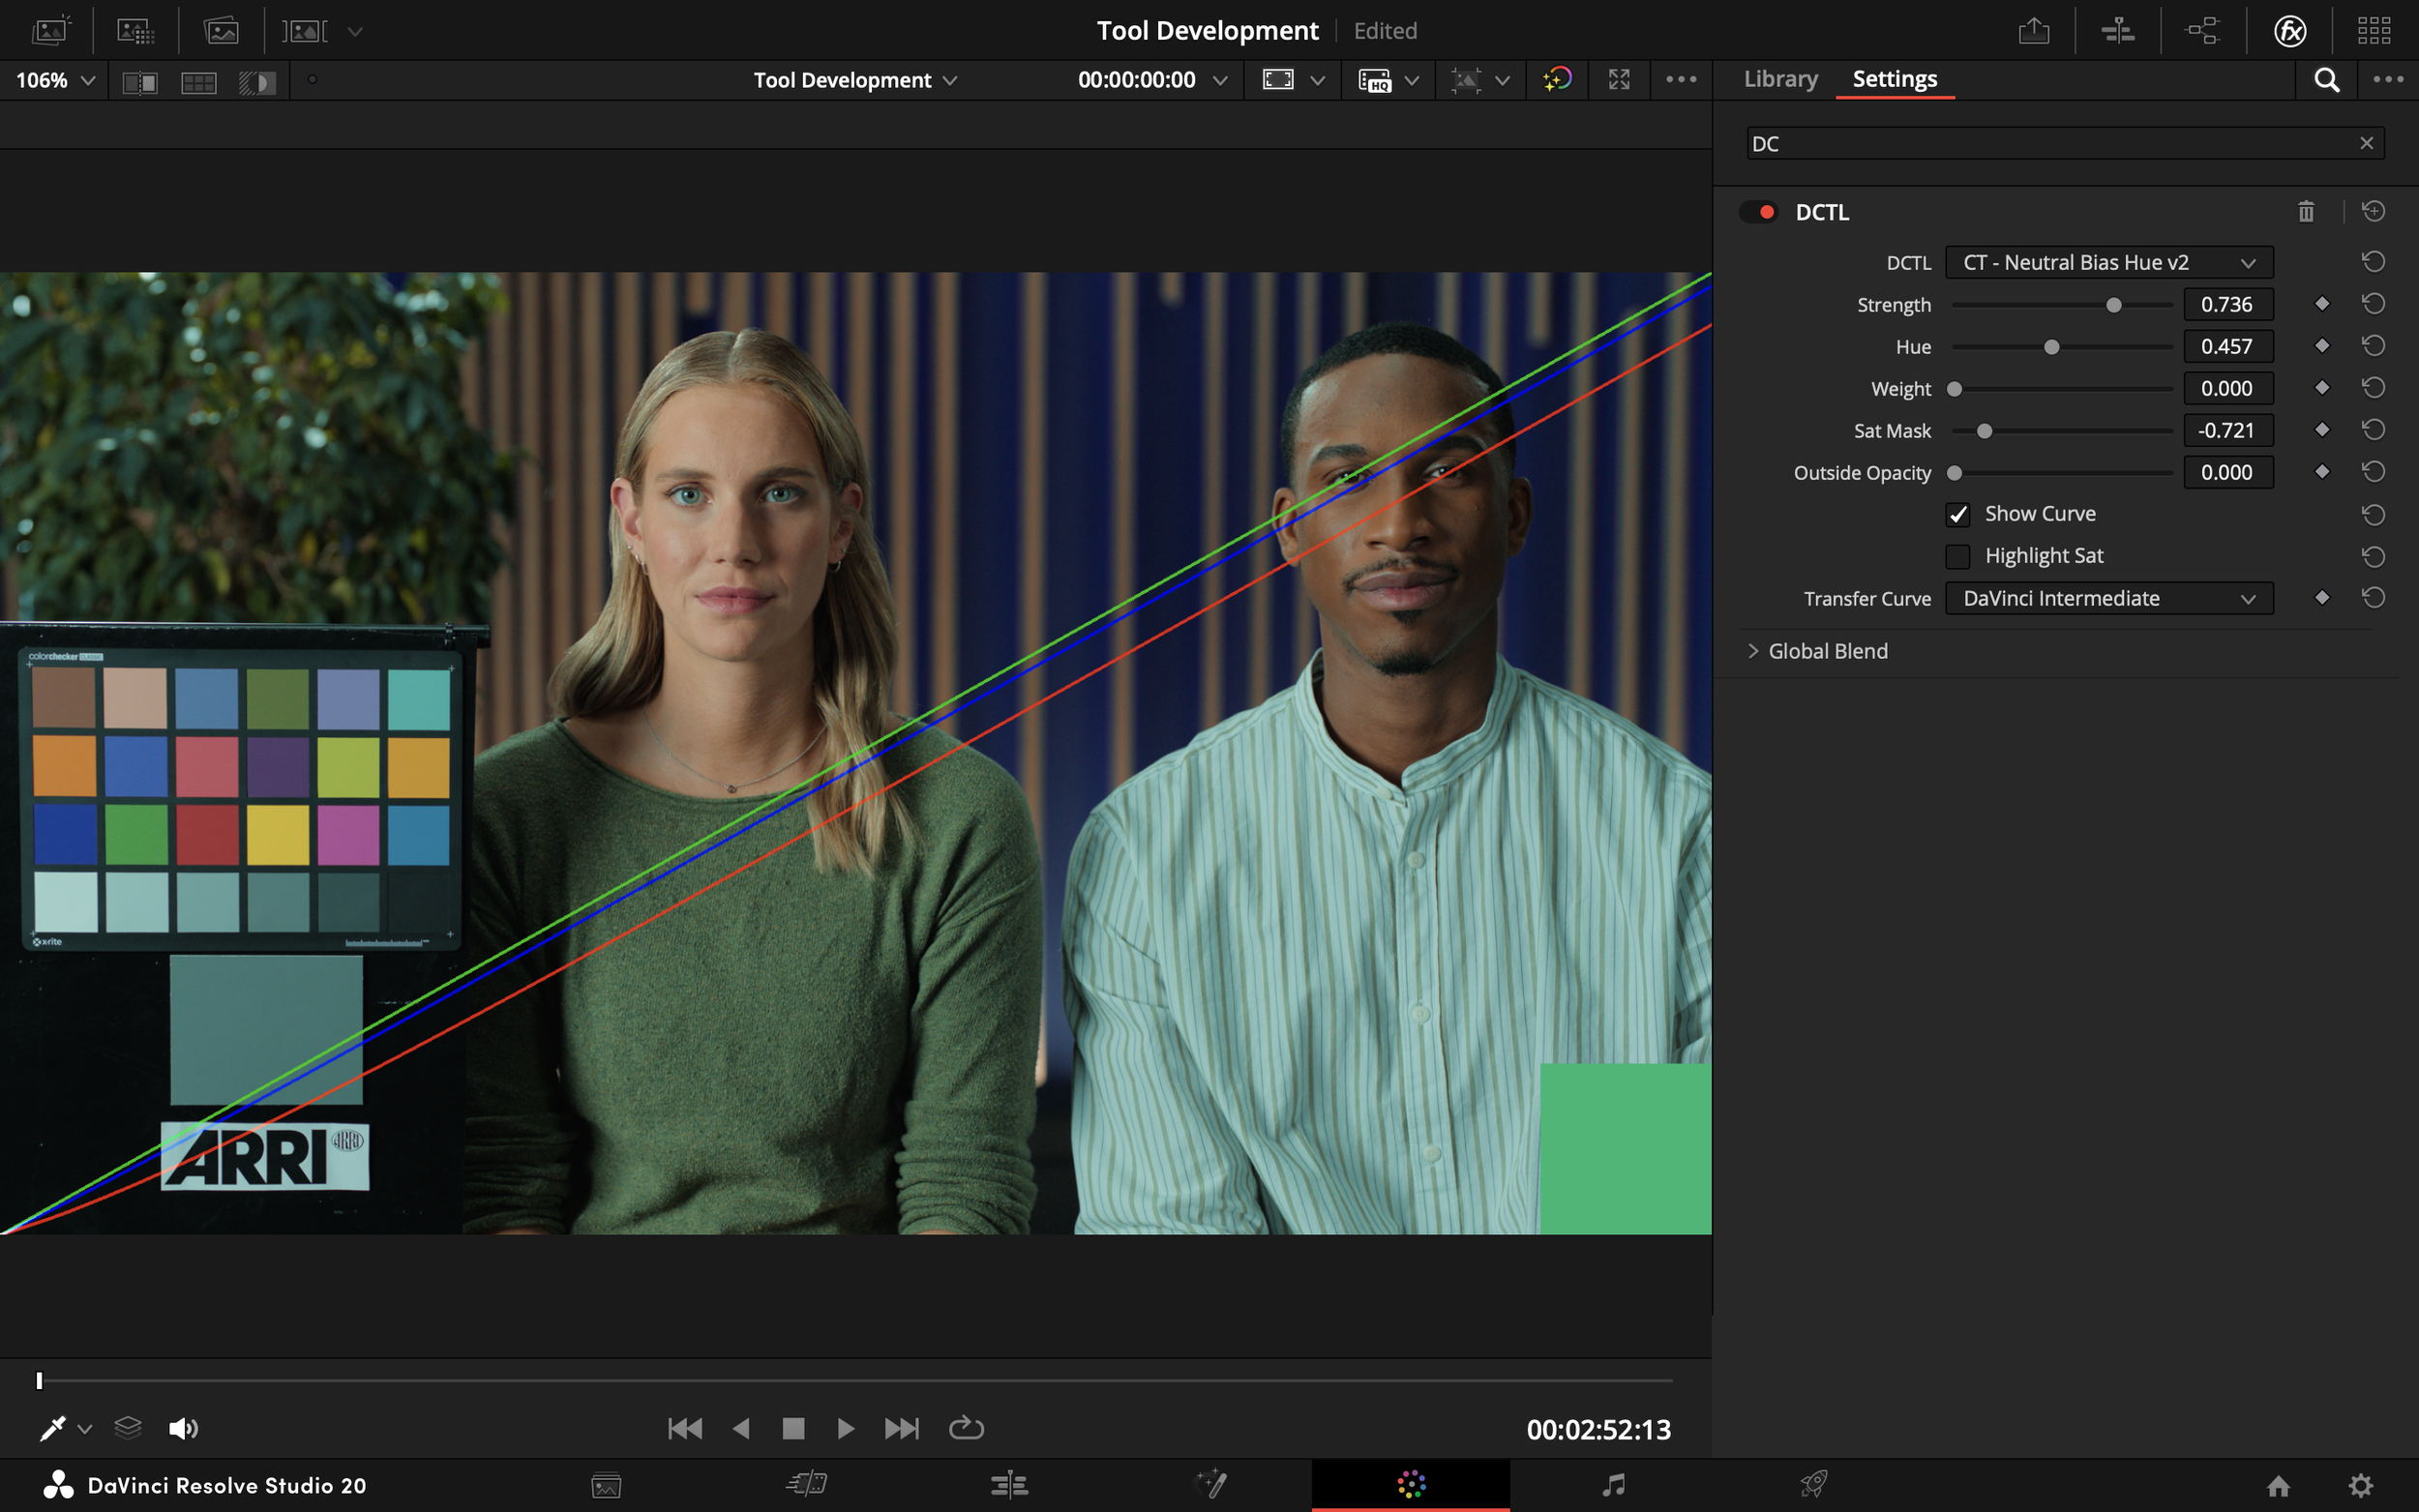 Image 2 of 2
-
This tool supports the following transfer curves: DaVinci Intermediate, Arri LogC3, and ACEScct.
-
Temp: Controls warm–cool color bias photometrically. Cool ← 0 → Warm
Tint: Controls green–magenta bias photometrically. Green ← 0 → Magenta
Sat Mask: Modulates the effect in either low sat or high sat regions.
Outside Opacity: Controls how much of the masked-out region is affected by the balance adjustment.
Show Curve: Overlays the adjustment curve on the image.
Highlight Sat: Displays the isolated sat key over a checkerboard to preview the affected area.
Transfer Curve: The transfer curve of your timeline colour space.
-
This tool functions as a saturation-versus-balance control, letting you adjust your image’s colour balance—temperature and tint—using exposure-style curves. It then limits the effect with an omni-directional saturation mask, so you can target low-saturation or high-saturation areas selectively.
While this technique is often done using a mix of layer mixers and qualifiers in Resolve—requiring you to jump between palettes and nodes—this DCTL simplifies the process by combining everything into one clean, intuitive tool with smooth curves for effortless control.
-
There’s plenty of flexibility in where you place this tool, as long as it stays within your timeline colour space. Personally, I like using it at the scene level—often within a scene group or as a shared node across multiple shots in a sequence. It’s a fantastic tool for adding bold, distinctive looks to specific scenes that need a bit of extra flavour.
This is also why I’ve categorised this tool as both a colour grading and look development tool—because I believe it sits somewhere in the middle, offering the flexibility and responsiveness of grading tools with the broader aesthetic shaping of look development.
-
Absolutely! While the effect is named Neutral Bias, it can also be used in the exact opposite way—pushing colour balance into highly saturated areas instead. Whether the tool biases towards neutrals or vibrant colours depends entirely on how you adjust the saturation mask control. The name Neutral Bias simply reflects what I believe will be the most common way users apply this tool.


