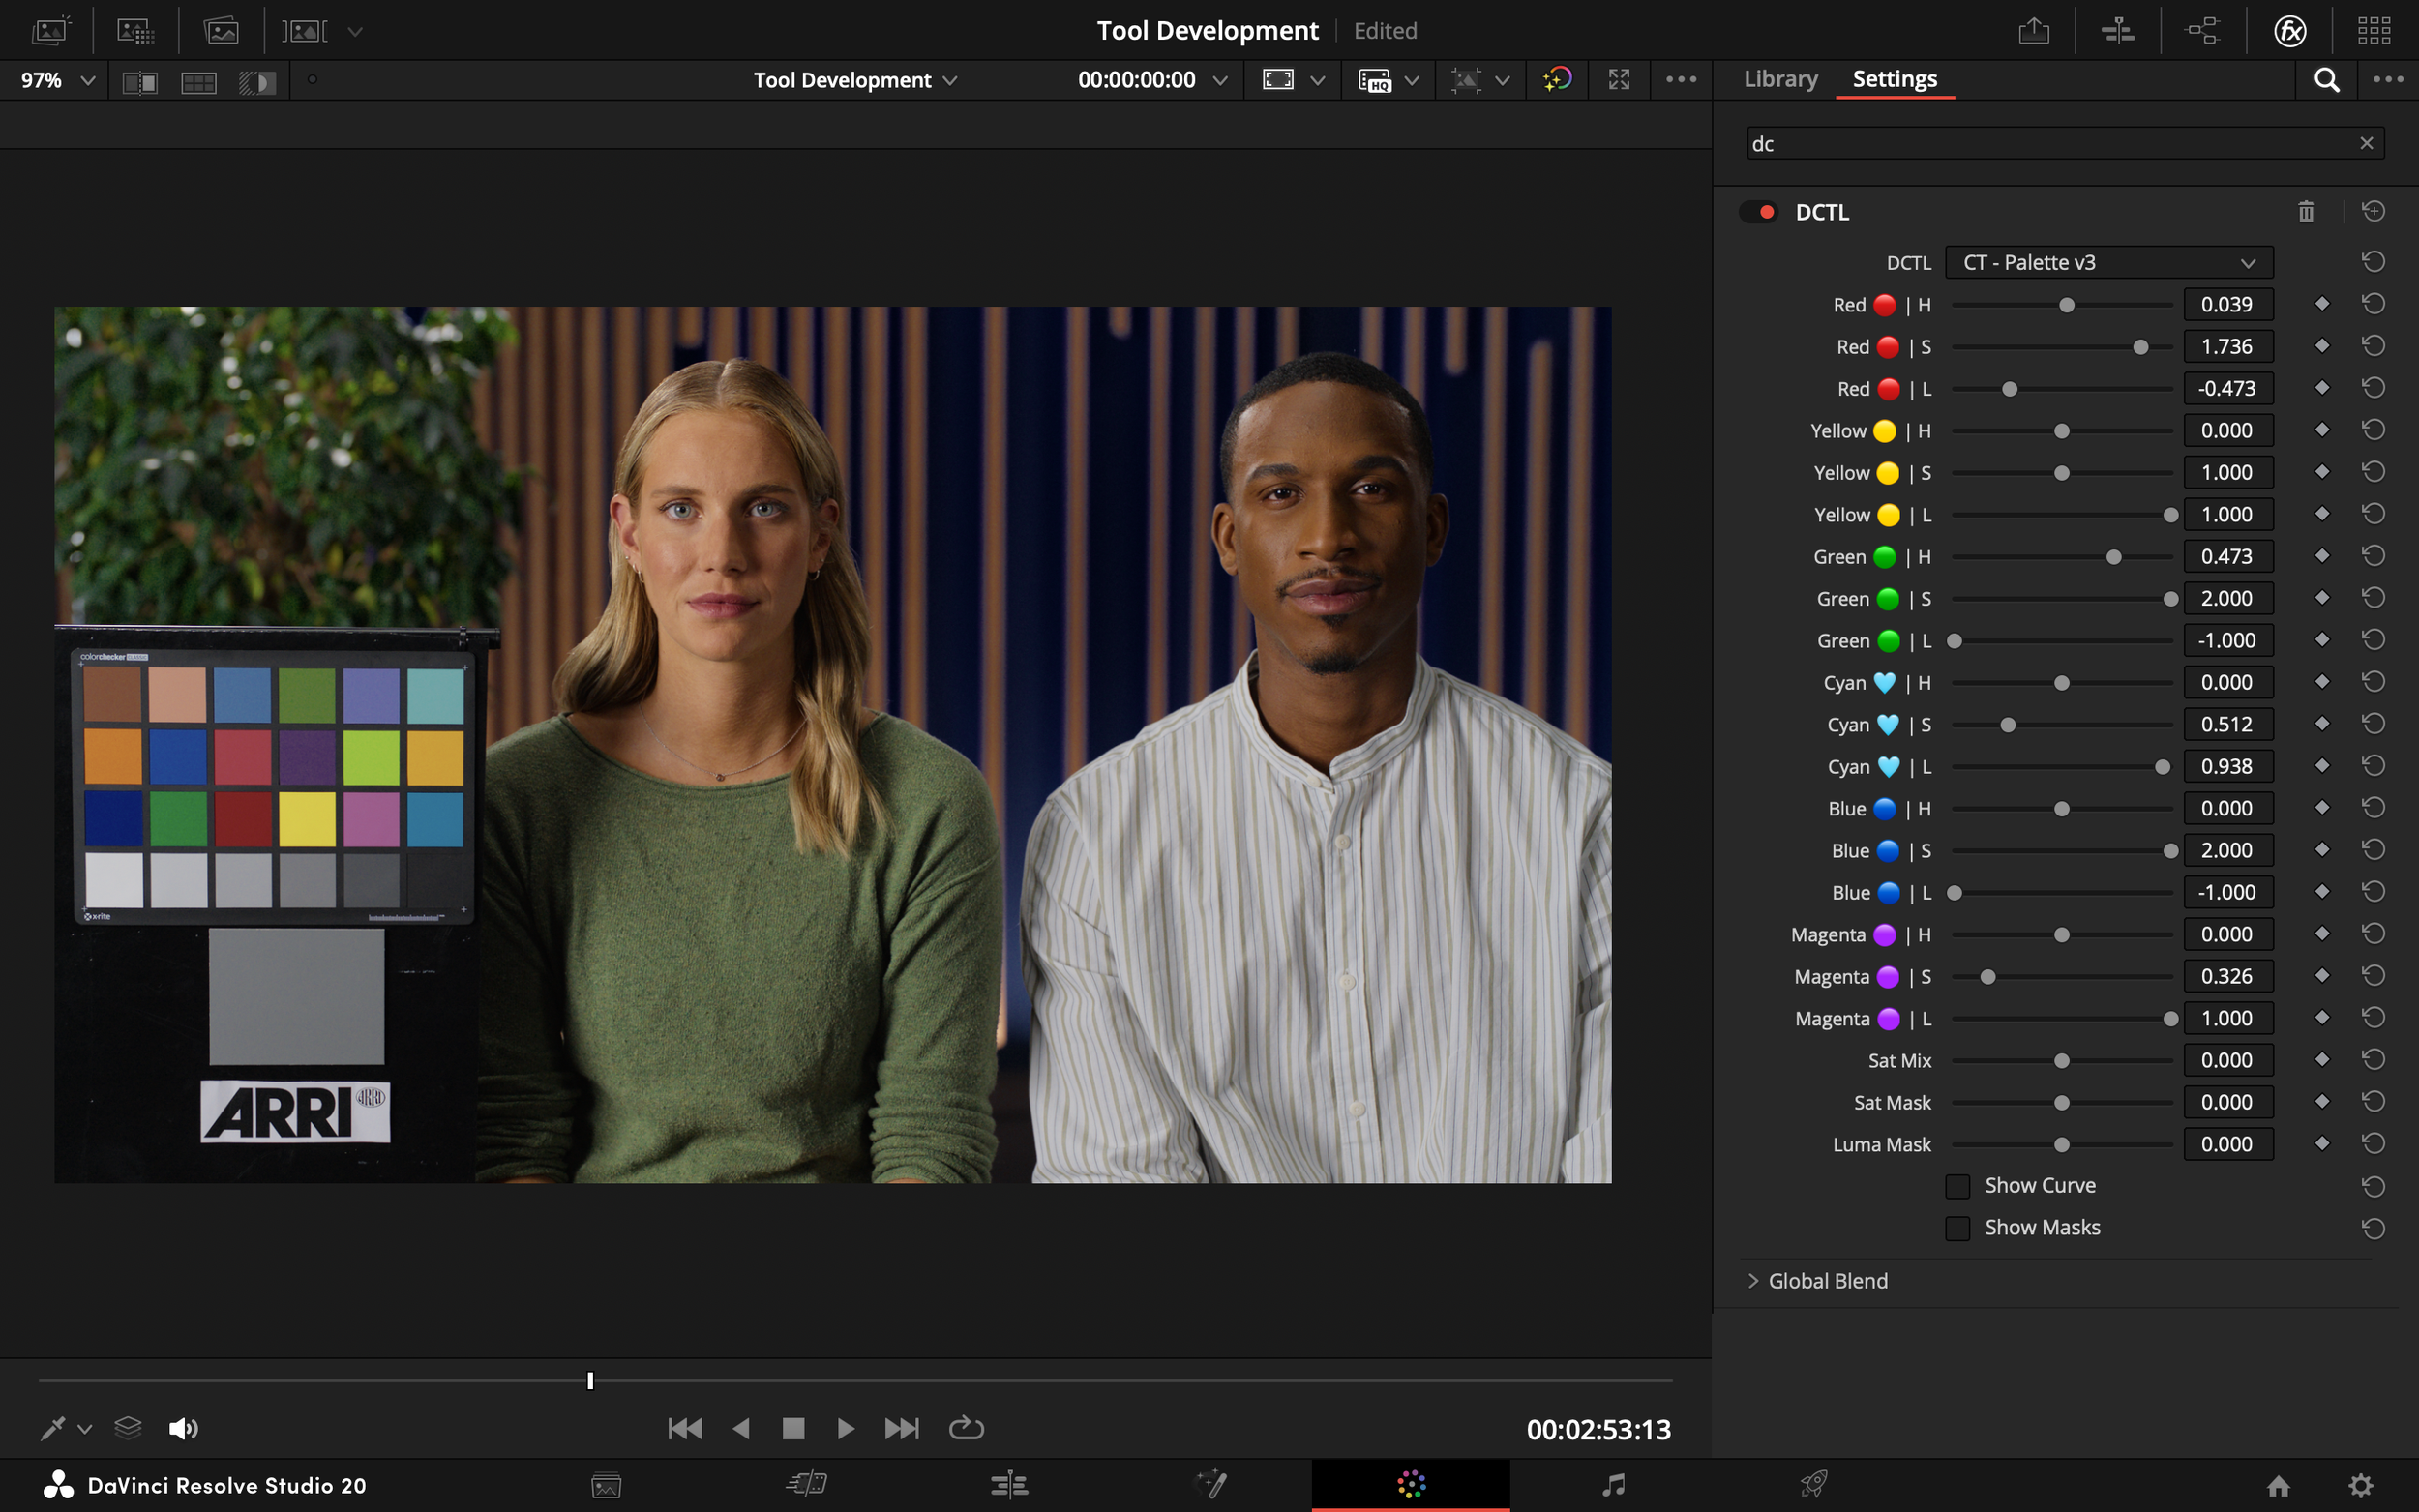
Palette

£35.00

This unified tool combines the functionality of Hue vs Hue, Hue vs Saturation, and Hue vs Luminance into one intuitive interface, offering smooth, spline-based hue adjustments across six primary colour regions: red, yellow, green, cyan, blue, and magenta. It enables clean hue rotations, hue saturation control, and hue density adjustments—ideal for maintaining a consistent look throughout a project—while allowing users to observe these changes via all three hue vs curves as overlays, making the process highly intuitive. These features facilitate the creation of muted or stylised looks, shape the overall palette, and establish a bold yet cohesive visual identity for your project, all while ensuring fluid transitions and preserving image integrity.

This unified tool combines the functionality of Hue vs Hue, Hue vs Saturation, and Hue vs Luminance into one intuitive interface, offering smooth, spline-based hue adjustments across six primary colour regions: red, yellow, green, cyan, blue, and magenta. It enables clean hue rotations, hue saturation control, and hue density adjustments—ideal for maintaining a consistent look throughout a project—while allowing users to observe these changes via all three hue vs curves as overlays, making the process highly intuitive. These features facilitate the creation of muted or stylised looks, shape the overall palette, and establish a bold yet cohesive visual identity for your project, all while ensuring fluid transitions and preserving image integrity.

Look Development Bundle
  • Red 🔴 | H: Shifts red hues. Magenta ← 0 → Yellow

    Red 🔴 | S: Saturation control for red hues.

    Red 🔴 | L: Luminance adjustment for red hues.

    Yellow 🟡 | H: Shifts yellow hues. Red ← 0 → Green

    Yellow 🟡 | S: Saturation control for yellow hues.

    Yellow 🟡 | L: Luminance adjustment for yellow hues.

    Green 🟢 | H: Shifts green hues. Yellow ← 0 → Cyan

    Green 🟢 | S: Saturation control for green hues.

    Green 🟢 | L: Luminance adjustment for green hues.

    Cyan 🩵 | H: Shifts cyan hues. Green ← 0 → Blue

    Cyan 🩵 | S: Saturation control for cyan hues.

    Cyan 🩵 | L: Luminance adjustment for cyan hues.

    Blue 🔵 | H: Shifts blue hues. Cyan ← 0 → Magenta

    Blue 🔵 | S : Saturation control for blue hues.

    Blue 🔵 | L: Luminance adjustment for blue hues.

    Magenta 🟣 | H: Shifts magenta hues. Blue ← 0 → Red

    Magenta 🟣 | S: Saturation control for magenta hues.

    Magenta 🟣 | L: Luminance adjustment for magenta hues.

    Sat Mix: Controls the blend of saturation types.

    Sat Mask: Modulates the effect in either low sat or high sat regions.

    Luma Mask: Limits the effect to shadows or highlights.

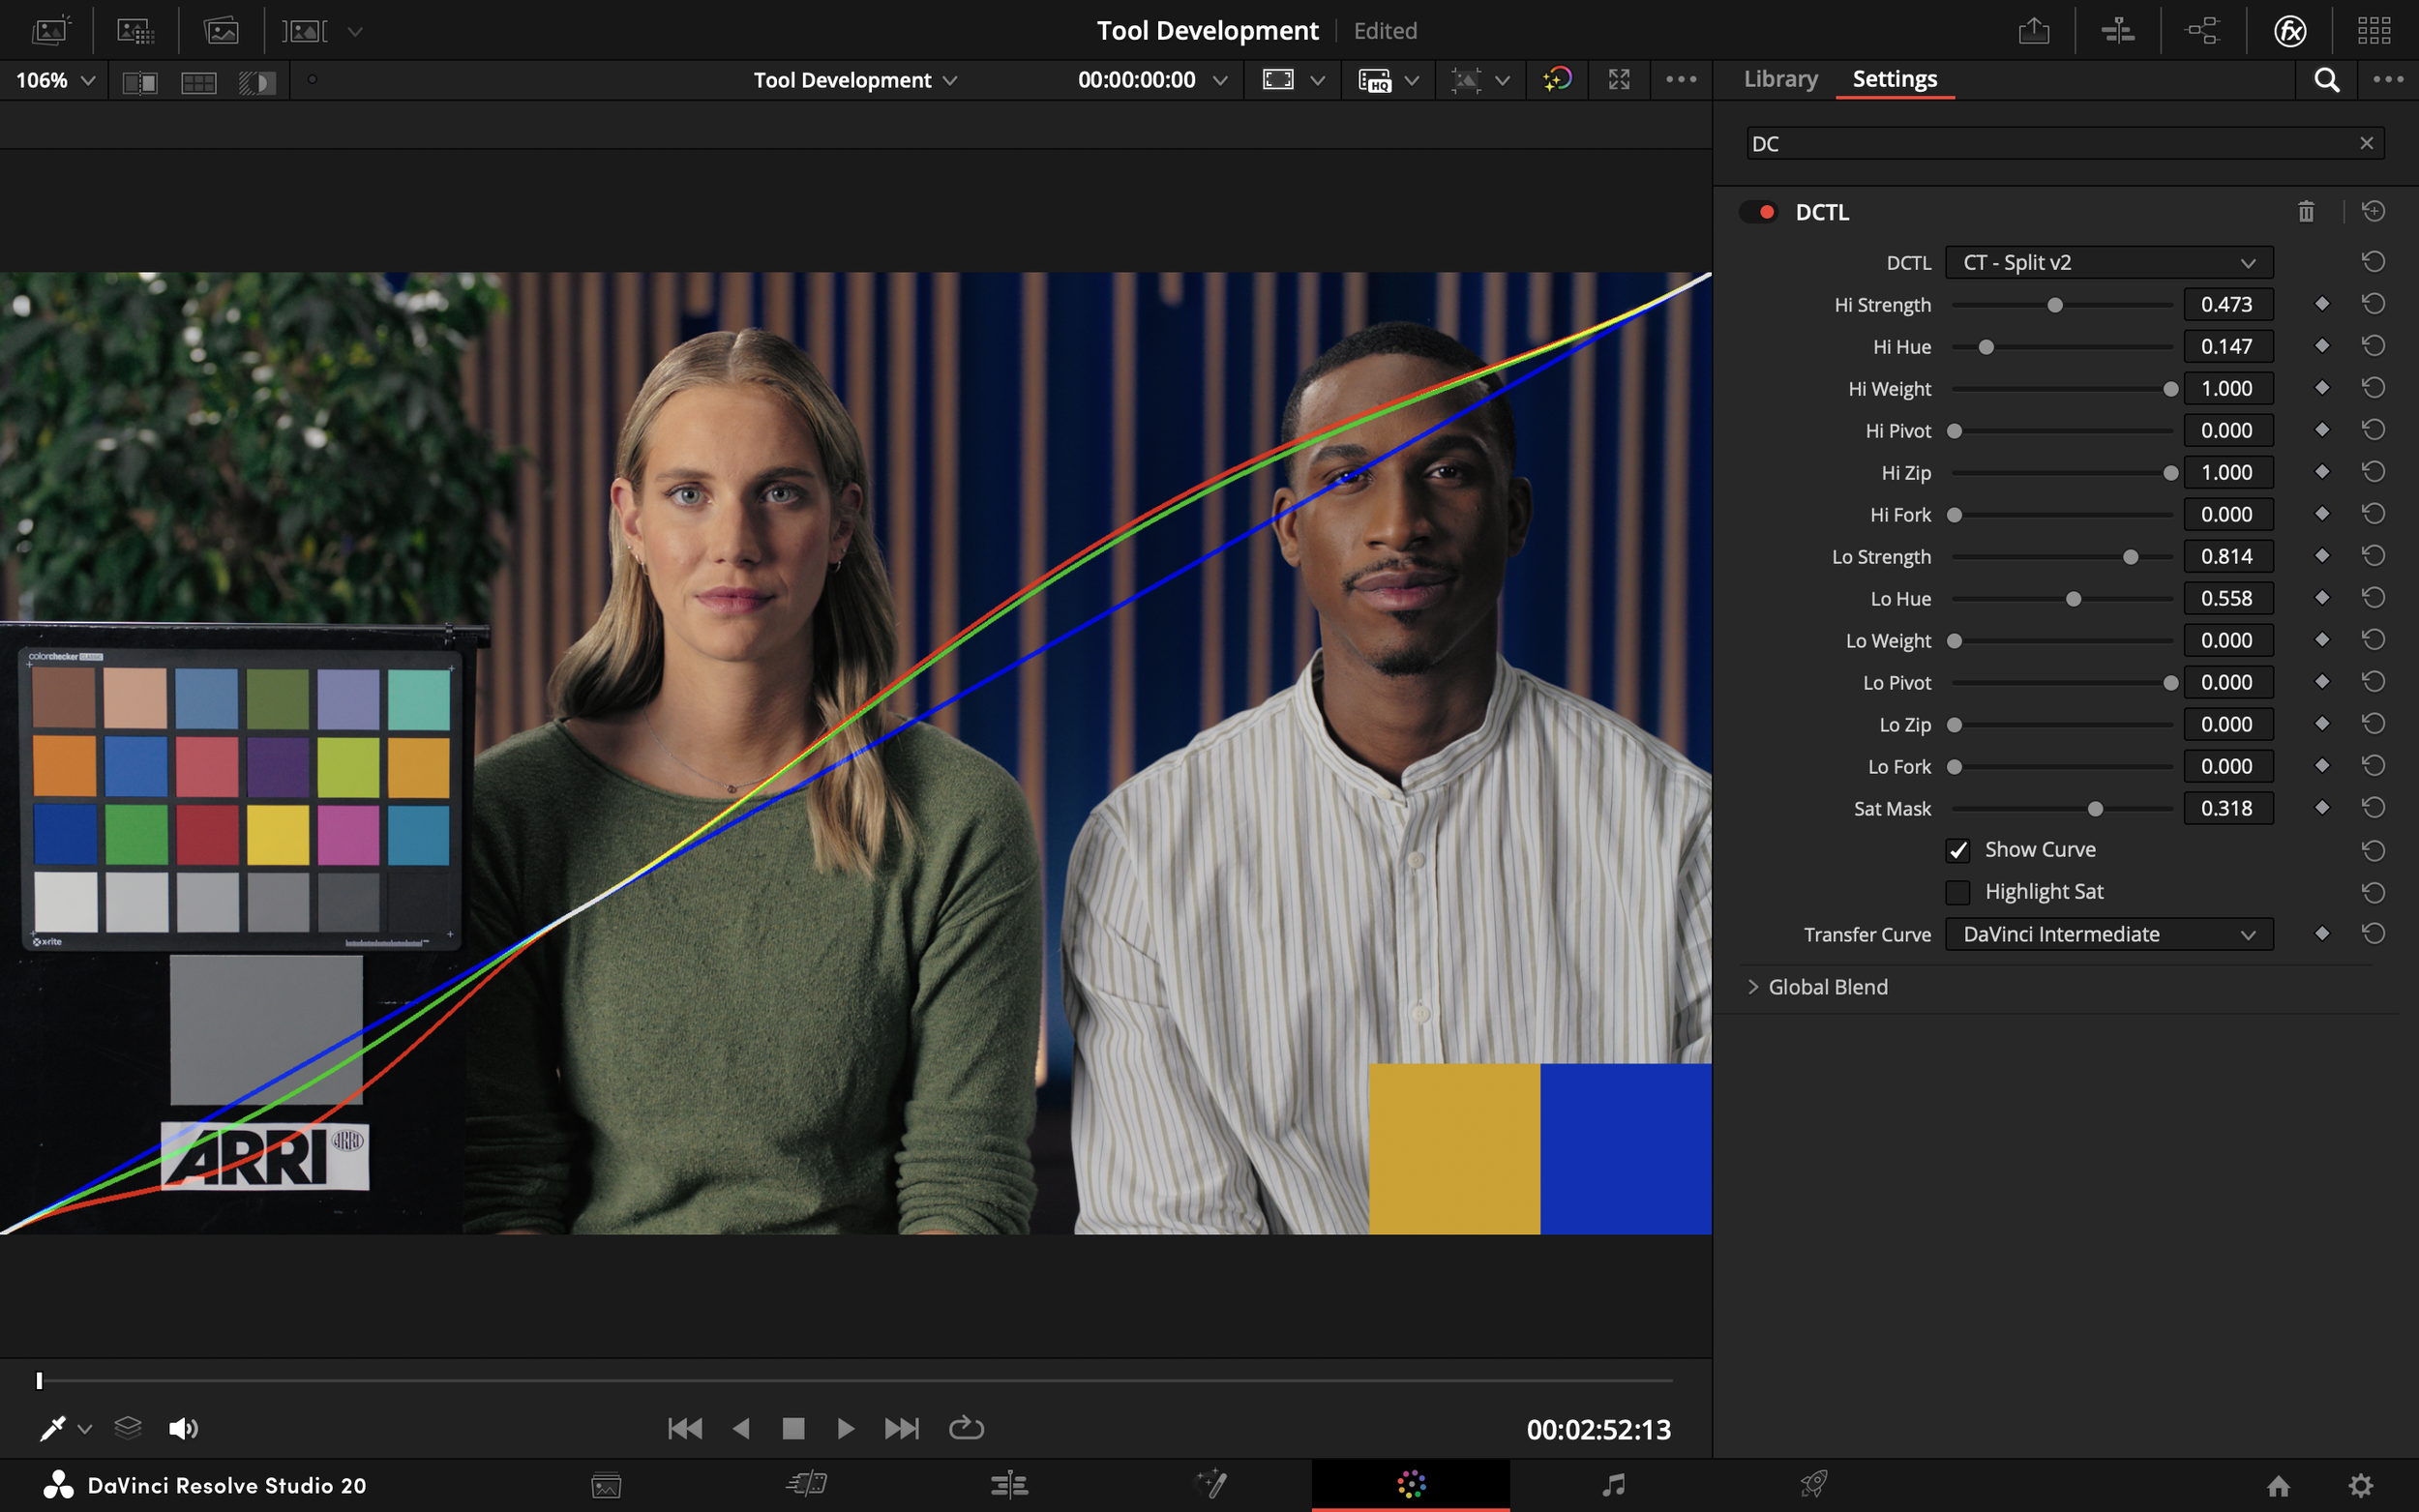
    Show Curve: Overlays the adjustment curve on the image.

    Show Masks: Shows the selected matte over a checkerboard to visualise the affected area.

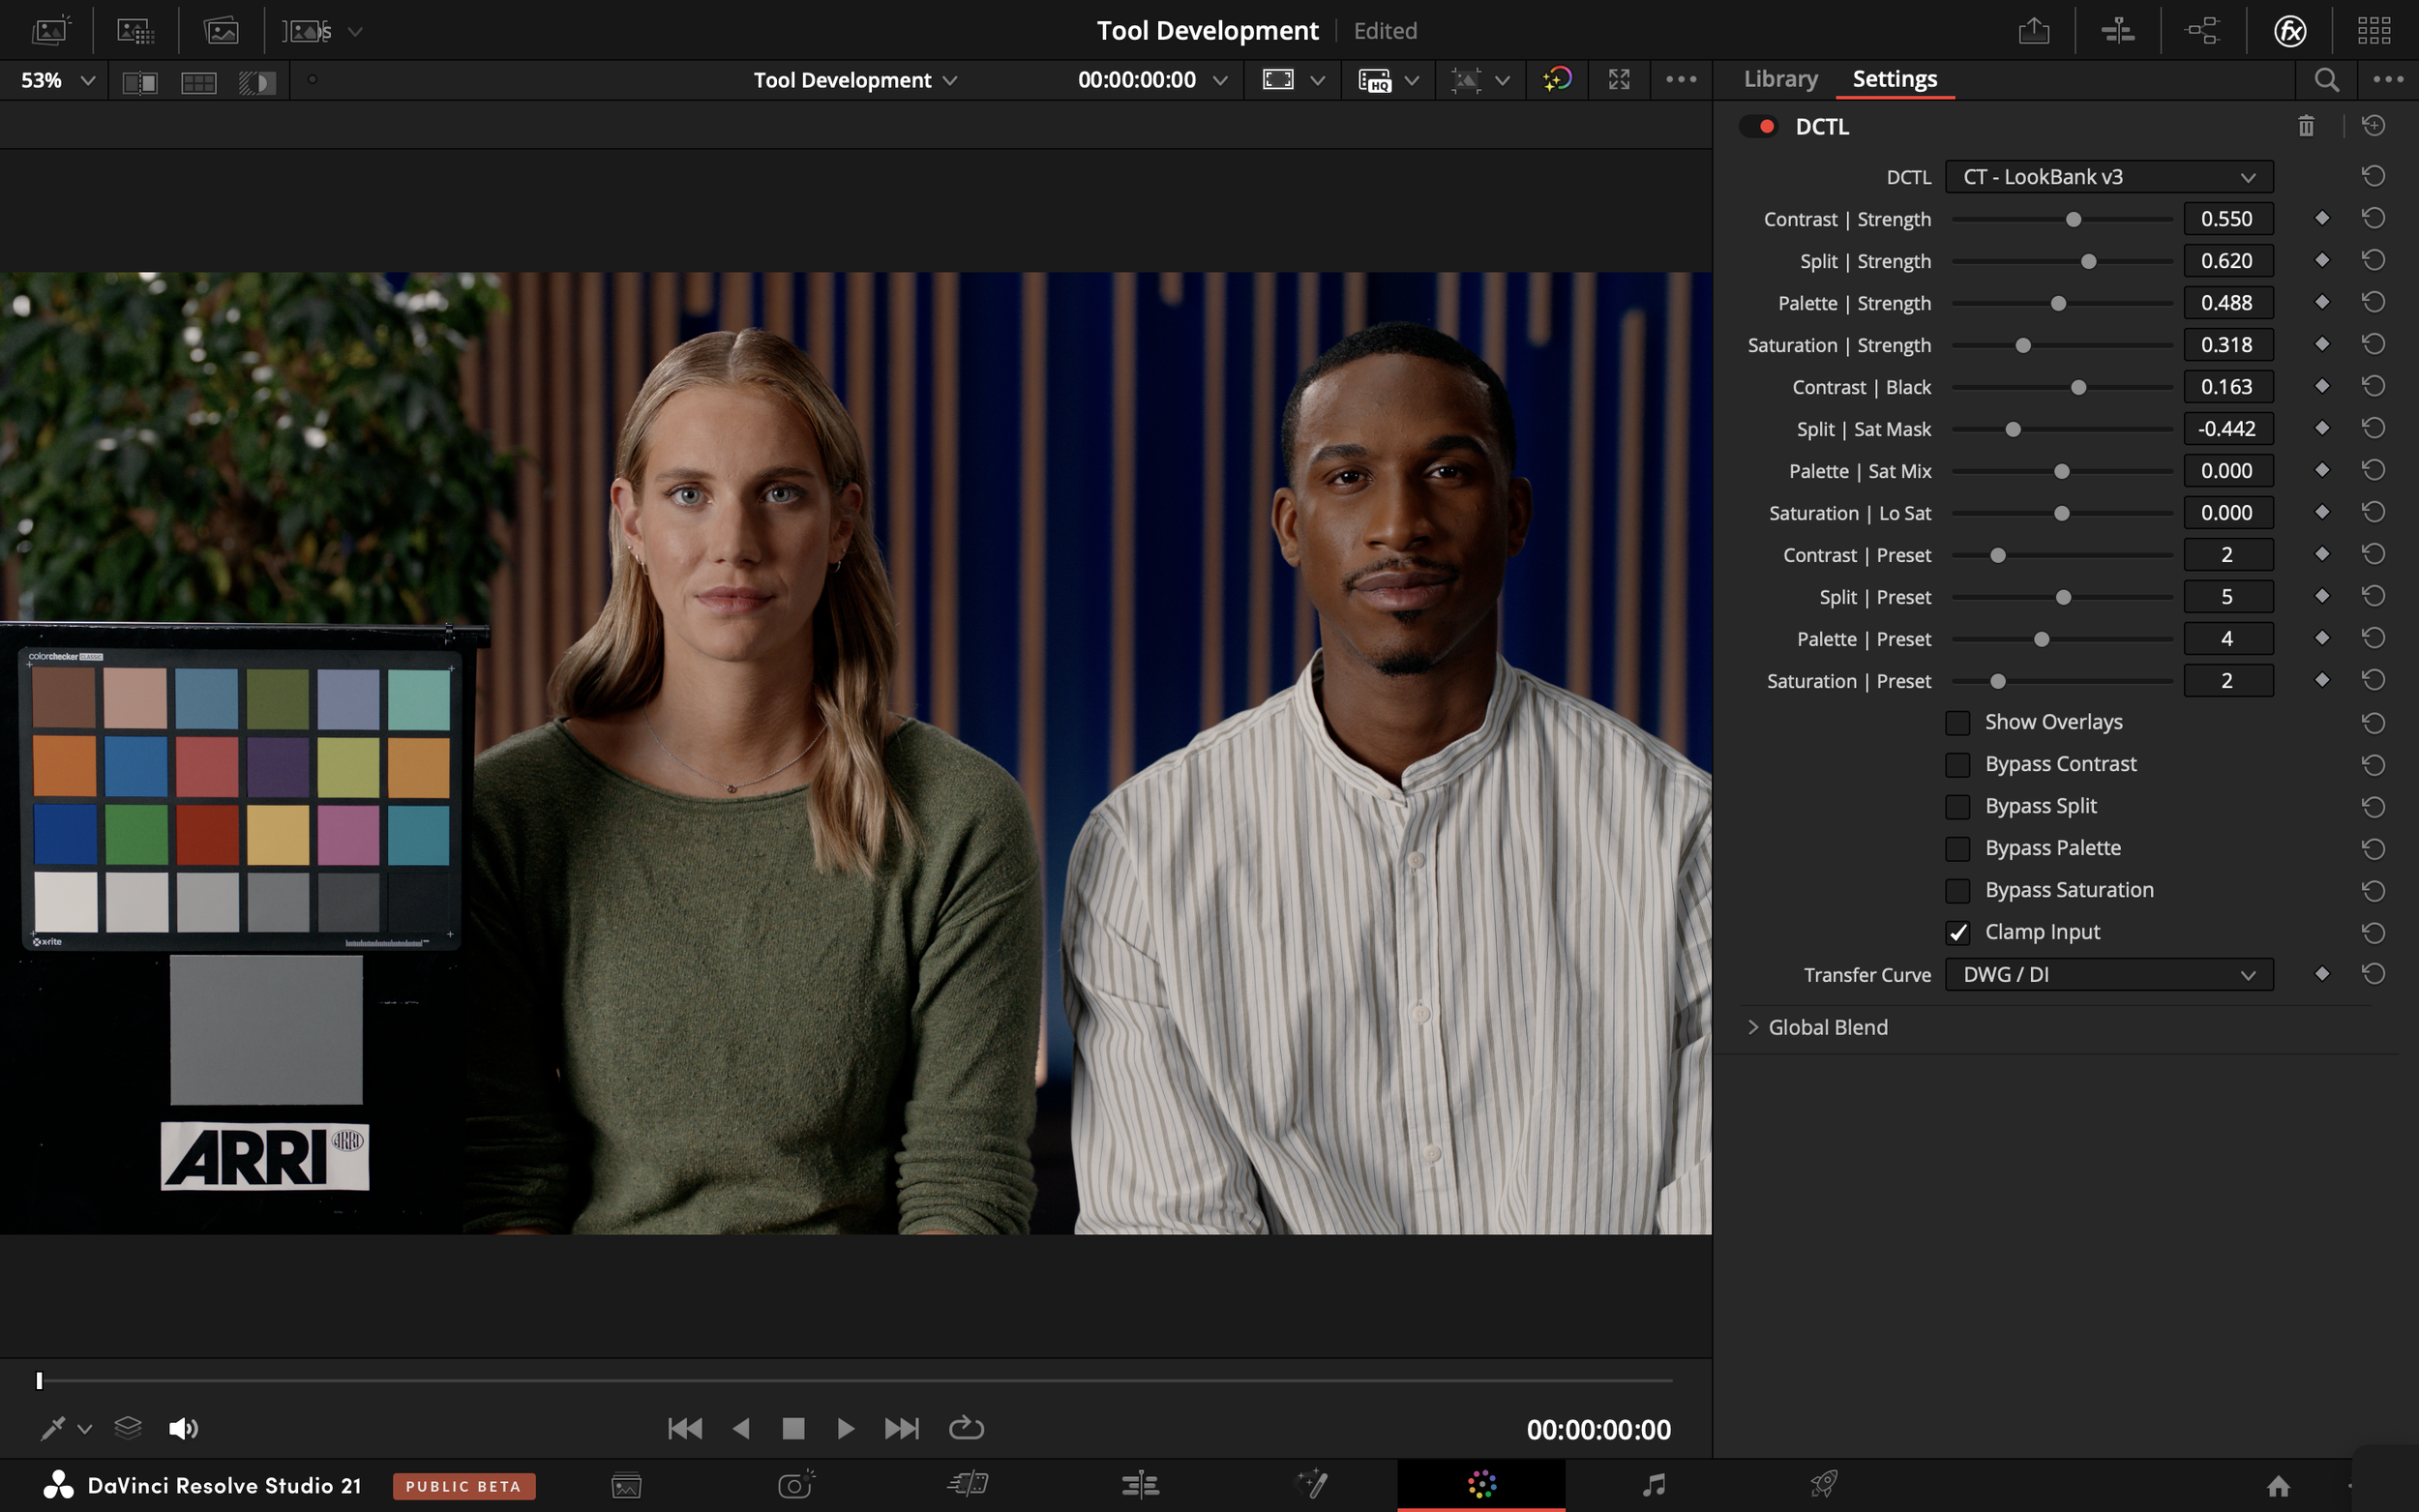
  • Whilst I made and tested this tool within a DaVinci Wide Gamut Intermediate pipeline, there’s nothing within the coding that forces it to be used in any particular colour space—since it simply shifts from RGB (which your images are in natively) to another colour model, applies the adjustments, and then returns back to RGB.